
A toilet flapper is a pretty simple device that sits in your toilet. It sits inside the tank and sort of resembles a plug. Its job is to open or close, allowing more water into the tank or keeping water out. Toilet flappers tend to last for five to ten years so it’s not something that you need to worry about too much. In addition, replacing a toilet flapper is easy enough for a beginner to do and it requires very few tools and materials. You will need a screwdriver, a paperclip, a sponge, and your replacement flapper.
Types of Flappers and Their Potential Problems
When it comes to toilet flappers, there are a few different types of flappers that could be in your toilet tank. They all attach to chains but they can vary in the actual flapper part. Some of them look sort of similar to a ball and sit on top of the overflow pipe in the tank. The chain is attached to a device that yanks it up whenever it needs to let more water into the tank. Potential problems with this flapper include having a chain that is too short or long.
A more modern type of flapper is a rubber one, which is a simple and dependable design. This flapper resembles a cap that sits on top of the overflow pipe. It also has a chain that is attached to a mechanism that lifts it up when the toilet flushes. Similar to the ball flapper, this one needs the right size chain in order to function properly. Other than that, it’s a straightforward device.
Finally, if your toilet is older, it might have an outdated seat disk flapper. As the name suggests, it resembles a disk and sits on top of the overflow pipe. It is attached to a plastic tube that hinges on to the overflow tube. When the toilet flushes, the flapper flips over and an attached container fills with water to weigh the flapper down. This is what allows the tank to fill with water. As you can imagine, this type of flapper is not nearly as dependable as the other two options so it’s best to replace it.
Identifying a Problem with the Flapper
How can you know that there is an issue with the toilet flapper? One telltale sign is that the toilet is running a lot without being flushed. This could be an issue with the flapper or the toilet float so it’s a good idea to check both. That being said, this guide is going to go over how to adjust the flapper only.
You can easily tell if there is an issue with the flapper by observing your toilet. If it’s running from time to time without being flushed, odds are that you need to adjust or replace the toilet flapper. Before you jump to conclusions, however, be sure to check on the chain attached to the flapper. It could simply be that the chain is stuck and isn’t allowing the flapper to open and close properly. Fixing this problem can be as simple as moving the chain around to get it unstuck.
Now, if the chain is just fine but the toilet is still running on its own, here’s how to fix your flapper.
Fixing Your Toilet Flapper
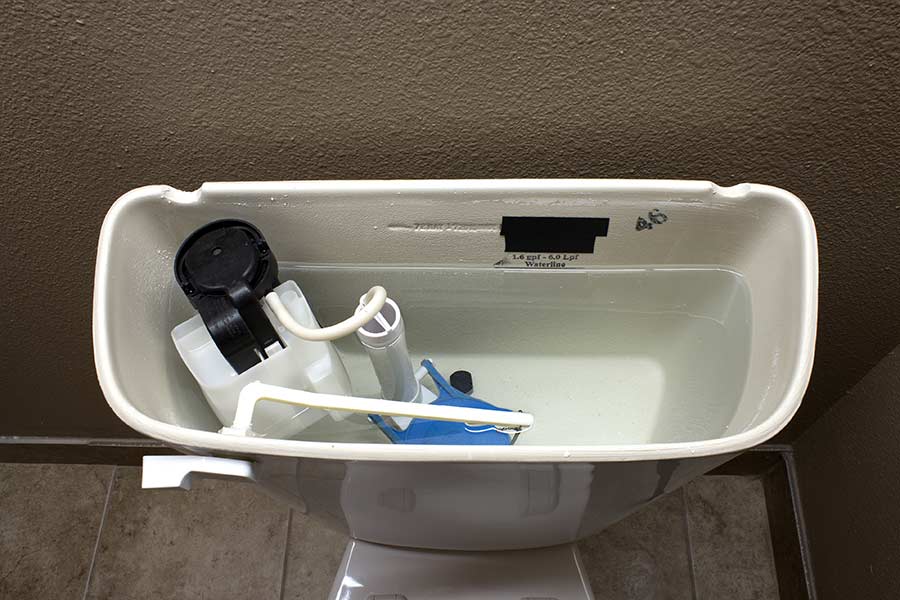
Your first step is to remove the lid of the tank. It’s best to put it on a carpet or rug so that you avoid damaging the lid. Then take a look inside the tank so that you can familiarize yourself with the different components. You should see the flapper at the bottom of the tank as well as its chain, which extends up and hooks to an arm connecting to the flusher.
You don’t need to empty the entire tank of water but if you want to wear some rubber gloves, feel free. Your next step is to unhook the flapper’s chain from the arm that extends from the flusher. Grab a paperclip and carefully straighten it out. Then use your fingers to shape it into a circle, leaving a tiny opening where the two ends meet. You can then hook the paperclip onto the metal arm that extends from the flusher.
At this point, you can reattach the chain, this time to the paperclip that is attached to the metal handle. You want to choose one of the links on the chain to attach to the paperclip. Pick a link that still allows the chain to have some slack when attached to the paperclip.
Test it Out
It’s time to give the toilet a flush and test the tightness of the chain. After you flush, look in the tank and watch as the rod attached to the flusher handle moves. Since it’s attached to the chain, it should lift the flapper up while the toilet flushes. You might need to readjust the placement of the chain on the paperclip so you get the ideal tightness. You will need to move the chain higher up if the flapper is not getting pulled all the way up. On the other hand, if the flapper is not completely covering the hole because the chain is too loose, you need a tighter fit.
Issues with the Flapper Valve
If you need to adjust or replace the flapper valve, you need to drain the tank. Turn off the water shutoff valve located behind the toilet and let the tank empty of water. Soak up any leftover water with a sponge. Use a wrench to unscrew the water supply hose attached to the flapper. Pop the flapper off of the tube that it’s attached to and replace it with a new one. Make sure that it is secured on the tube and then reattach the chain and water supply hose. This should get everything back to functioning properly but wait to watch the tank fill back up with water so that you can be sure. That’s just about it for replacing your toilet flapper!